
You install the Canon MF210 drivers, restart the computer, open Printers & scanners… and Windows still only shows Canon MF210 Series (FAX). The normal printer is nowhere to be found..
We recently ran into exactly this issue on a Windows 11 PC. The Canon driver was installed correctly, Windows could see the device, but it had failed to create the normal printer queue.
The key point: Before repeatedly reinstalling the driver, check whether Windows already has the correct driver and USB port but simply failed to create the printer queue.
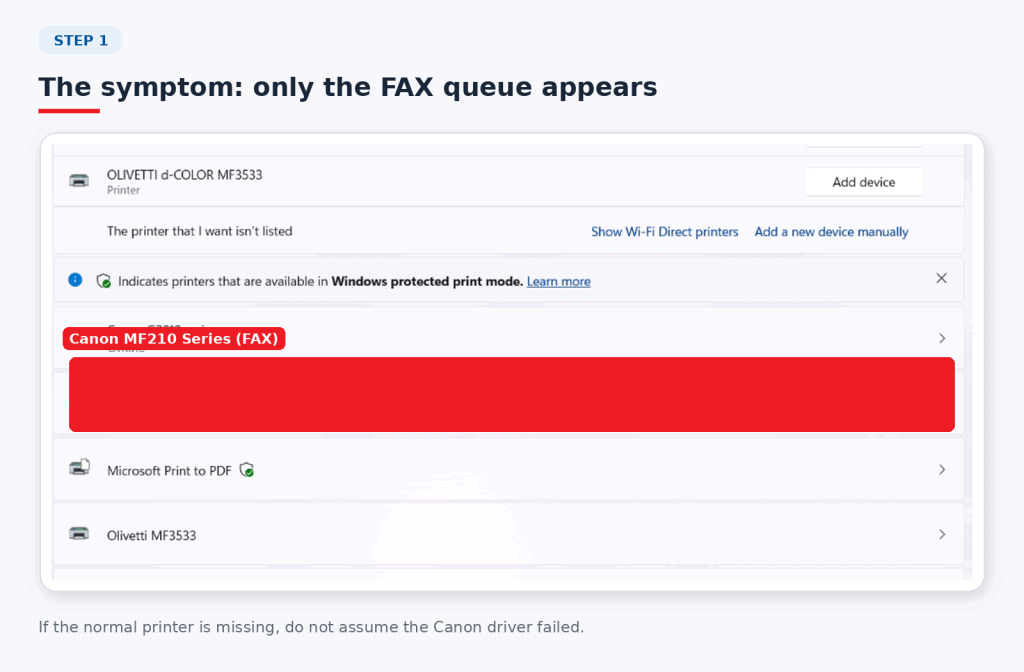
1. The symptom: Windows only shows the FAX printer
In our case, Windows showed the Canon MF210 fax device, but the normal Canon MF210 Series printer was missing from the list.
2. Check Windows Protected Print Mode
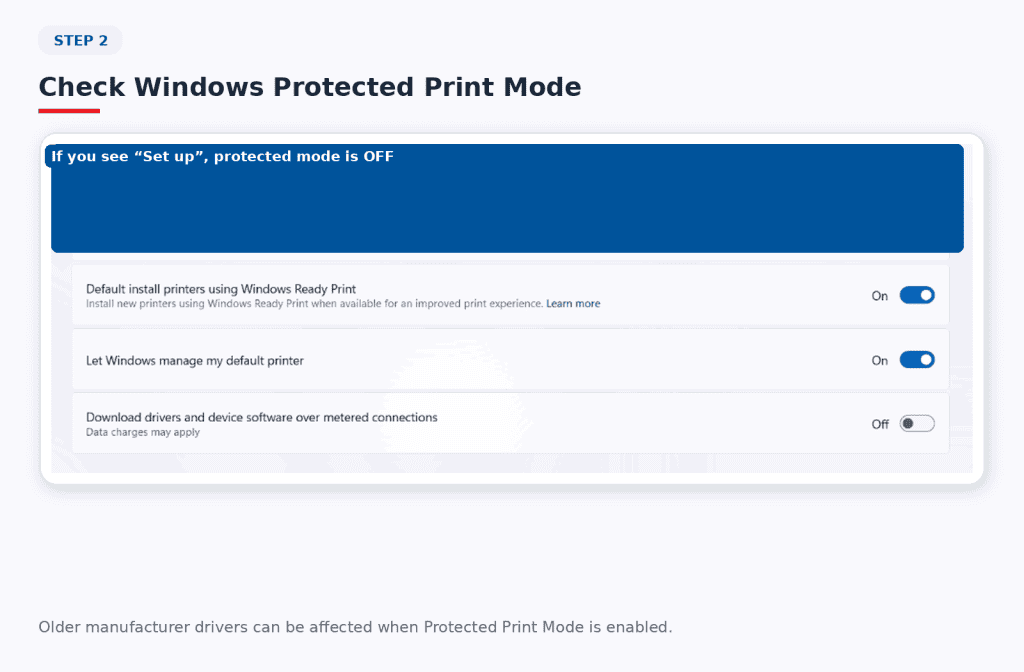
Windows 11 includes Windows Protected Print Mode, which can limit the availability of older third-party printer drivers.
Go to Settings > Bluetooth & devices > Printers & scanners, then scroll down to Printer preferences.
If the button next to Windows Protected Print Mode says Set up, the feature is currently off. In our case it was already disabled, so we moved on
3. Confirm the Canon MF210 driver is actually installed
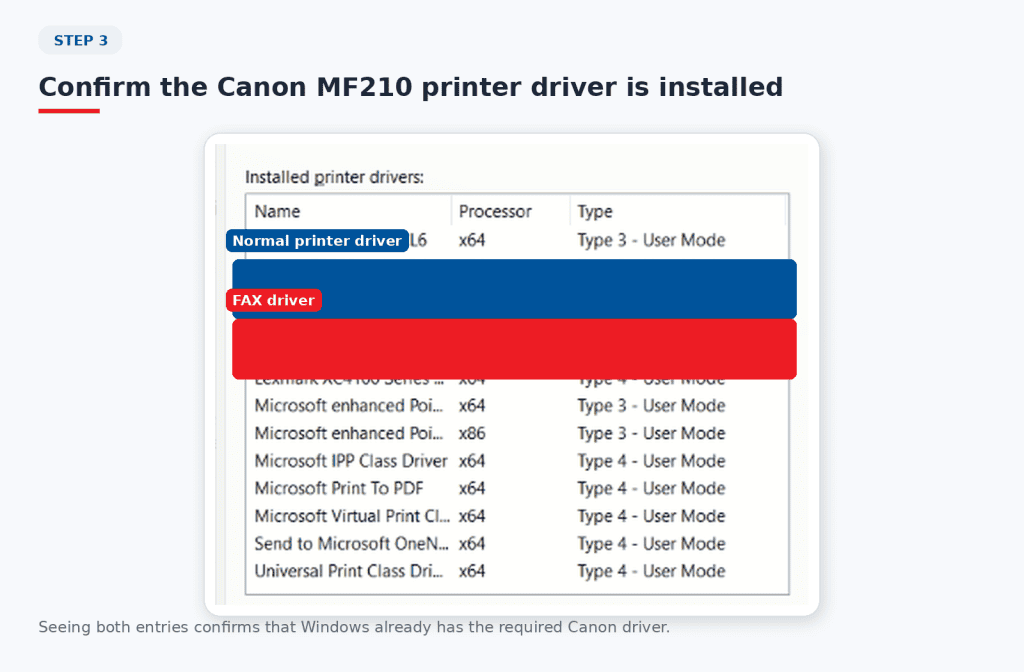
Open Print server properties and select the Drivers tab.
We could see both Canon MF210 Series and Canon MF210 Series (FAX). That confirmed that the normal printer driver had already installed successfully.
4. Check which USB ports Windows created
Next, open Print server properties > Ports. This is where the problem became clear. On this PC, Windows had created separate USB entries for the device. The FAX queue was attached to
one USB port, while a second USB port was identified as Canon MF210 Series but had no normal printer queue assigned to it.
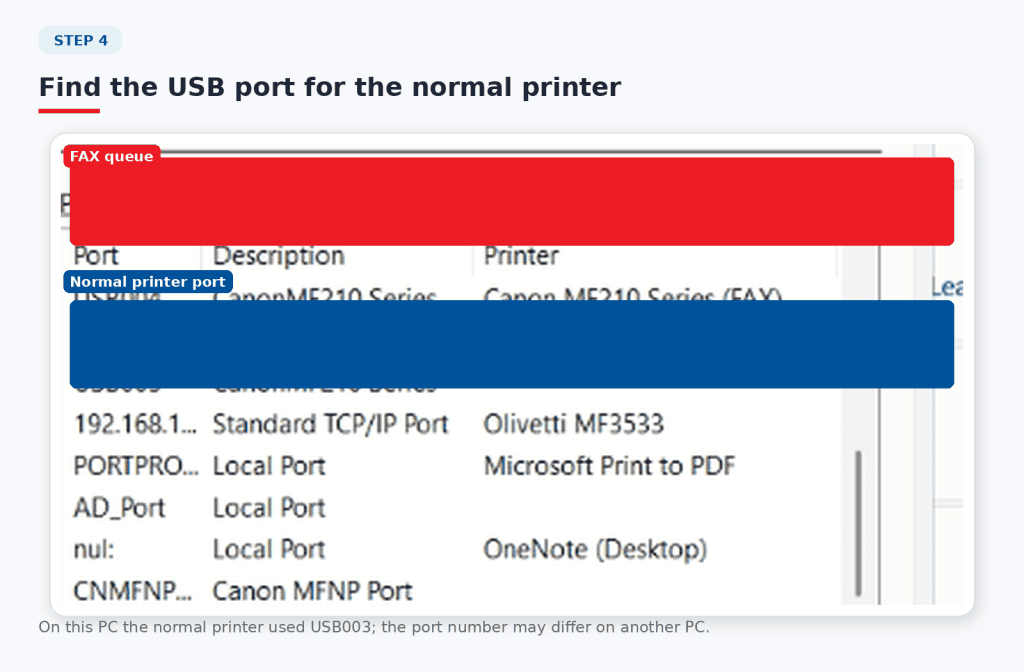
In this example the normal printer was associated with USB003 and the FAX queue with USB004. Your port numbers may be different.
Important: Do not copy the USB003 number blindly. Always use the USB port shown for Canon MF210 Series on the PC you are fixing.
5. Manually add the normal Canon MF210 printer
Go back to Settings > Bluetooth & devices > Printers & scanners and choose Add device.
Then choose Add a new device manually / The printer that I want isn’t listed, followed by Add a local printer or network printer with manual settings.
Select the existing USB port associated with Canon MF210 Series, then continue to the driver selection screen
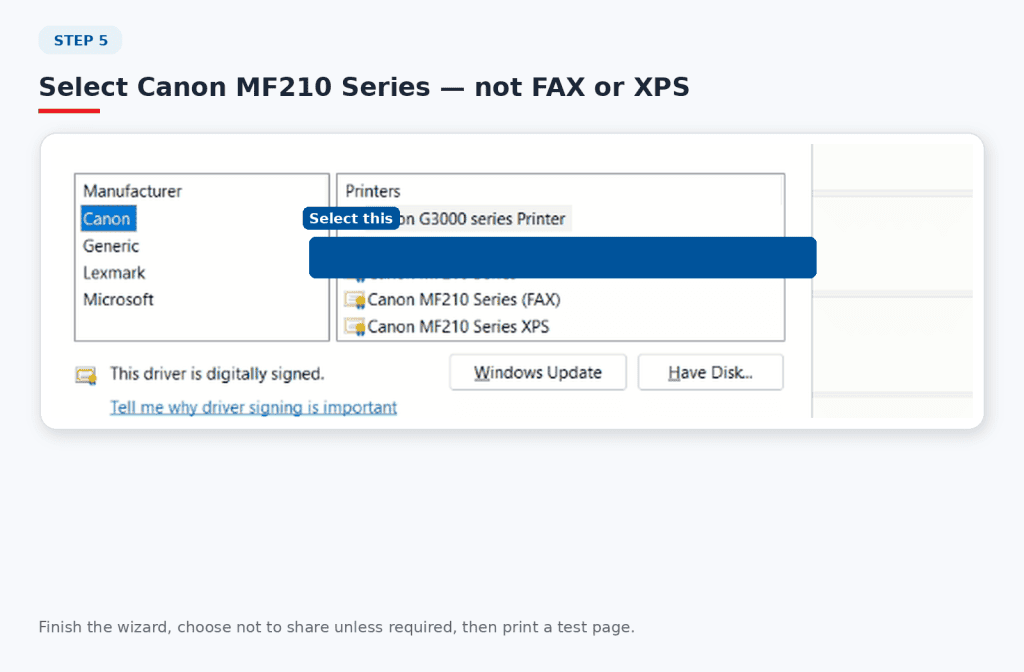
6. Finish the setup and test
Complete the wizard and print a test page. In our case the test page printed immediately and the normal printer then appeared correctly under Printers & scanners.
Why did this happen?
Manually creating the standard Canon MF210 printer queue and linking it to the correct USB port allowed Windows to use the driver that was already installed.
Before reinstalling your printer drivers…
• Is the normal printer driver listed under Print Server Properties > Drivers?
• Is there a separate USB port for the printer under Print Server Properties > Ports?
• Can you manually create a printer using that driver and USB port?
Haloweb tip: Sometimes Windows already has all the pieces. They just have not been connected to the correct printer queue.
Printer problems can look simple until you’ve spent an hour reinstalling drivers, changing cables and restarting computers.
Haloweb provides practical IT support, troubleshooting, email support, hosting, website services and technical assistance for businesses and individuals.